GE Dryer Repair Mastery: Troubleshoot and Maintain for Optimal Performance
When your GE dryer isn't working properly, start by checking the power supply and ensuring the …….

When your GE dryer isn't working properly, start by checking the power supply and ensuring the dryer is plugged in correctly with no tripped circuits. If the dryer won't turn on, inspect the door latch assembly and replace any faulty components. If the dryer powers up but isn't heating, suspect a problem with the heating elements or thermostat; these can be replaced after shutting off the power and removing the rear panel to access the heating unit. Regular maintenance is crucial for prevention and longevity: clean the lint filter after each use, clear any blockages in the ductwork, inspect and replace worn drum seals, rollers, or belts as needed, and lubricate rollers while adjusting belt tension safely by unplugging the dryer. Regular temperature checks with an oven thermometer can confirm the dryer operates at the correct settings for peak performance. Regular upkeep will help maintain your GE dryer's efficiency and extend its lifespan.
When it comes to ensuring your GE dryer delivers consistent drying performance, proactive maintenance and timely repairs are key. This article provides a comprehensive overview of common issues faced by GE dryer users, followed by a detailed step-by-step guide for troubleshooting, ensuring your appliance operates at its best. Furthermore, we’ll explore essential maintenance tips to uphold the reliability of your GE dryer over time. By understanding these aspects, you can safeguard not just your laundry routine but also extend the lifespan of your dryer, enhancing energy efficiency and optimizing your drying experience.
- Identifying Common Issues with GE Dryers
- Step-by-Step Guide to Troubleshooting GE Dryer Problems
- Maintenance Tips for Long-Term GE Dryer Reliability
Identifying Common Issues with GE Dryers

When encountering issues with a GE dryer, it’s crucial to pinpoint the problem accurately to implement an effective solution. Common malfunctions range from mechanical failures such as drum bearing noise or a failure to turn, which may indicate worn-out components that require replacement, to electrical concerns like the dryer not starting, which could be due to tripped circuits or faulty switches. Additionally, if the dryer is not heating adequately, it’s likely that the heating element or thermal fuse has failed, and these parts will need inspection and possible repair or replacement. Lint buildup in the vent or lint trap can also impede airflow, leading to suboptimal drying performance. Regular maintenance, such as cleaning the lint filter after each use and inspecting the dryer’s exterior for signs of wear and tear, can help prevent many common issues from arising. Recognizing these indicators early on allows for timely repairs, ensuring your GE dryer maintains reliable drying performance.
Step-by-Step Guide to Troubleshooting GE Dryer Problems

When encountering issues with your GE dryer, a step-by-step troubleshooting guide can help you identify and resolve the problem efficiently. Begin by checking the power supply to ensure the dryer is properly plugged in and that there are no tripped circuits or blown fuses interrupting the electrical flow. If the dryer doesn’t respond, inspect the door latch assembly. A malfunctioning latch can prevent the dryer from starting for safety reasons. To access the latch, remove the front panel and examine the spring and latch mechanism, making adjustments or replacements as necessary.
Next, if the dryer starts but fails to heat, inspect the heating elements and thermostat. Over time, these components can wear out or become coated with residue, affecting their performance. To replace them, disconnect the power and remove the rear panel to access the heating unit. Carefully unhook the wires from the old elements and thermostat, then attach them to the new parts after installation. Ensure that the connections are secure and that the new components are properly seated within their housings. Proceed through each step methodically, verifying connections and component function at each stage for optimal drying performance.
Maintenance Tips for Long-Term GE Dryer Reliability

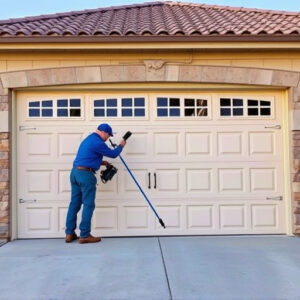
To maintain the reliability and optimal performance of your GE dryer over time, it’s crucial to perform regular maintenance tasks. One of the most important aspects is ensuring the lint filter is cleaned after each use. A clogged filter can restrict airflow, leading to longer drying times and potential overheating. Additionally, inspect the dryer ductwork for any blockages that could impede ventilation. Use a flexible metal brush to remove any accumulated lint from both the exterior and interior of the exhaust duct.
Checking the drum seal and rollers is also essential for long-term reliability. A damaged or worn-out seal can cause moisture to leak into your laundry room, while faulty rollers may lead to clothing not tumbling correctly, resulting in inefficient drying. If you notice any issues with the drum seal or rollers, replace them promptly. Lubricating the rollers and belt tension adjustment can also extend the life of these components. Remember to unplug the dryer before attempting any maintenance tasks that involve the interior components. Regularly testing the dryer’s temperature settings using an oven thermometer ensures it operates at the correct temperature for drying clothes effectively. By following these maintenance tips, you can enhance the longevity and reliability of your GE dryer.
Ensuring your GE dryer operates efficiently is key to hassle-free laundry cycles. By understanding common issues, utilizing the step-by-step troubleshooting guide, and committing to regular maintenance as outlined in the article, you can maintain your dryer’s reliability and drying performance. Regular checks and minor repairs can prevent major malfunctions, thereby extending your appliance’s lifespan. Remember, a well-maintained GE dryer is a critical component of an orderly home laundry routine.